The Concept
TDR Arbiter is a frequency-specific spectral balancer. Acting independently of absolute level, this audio plugin makes an ideal solution for a wide range of common audio challenges. Be it De-Essing, the attenuation of plosives, correcting broad frequency balance issues (sharpness control), or signal acceleration control, the smooth set-and-forget nature of the algorithm helps achieve musically convincing results within the shortest time.
Up to three bands can be specified in the form of bell, flat top, and traditional shelving shapes. Arbiter supports both positive (upward) and negative (downward) control ranges, offering intuitive control over a signal’s dynamic frequency balance. A set of harmonic generators allows for creative compensation of any loss introduced by the filtering, extending an otherwise mostly transparent filtering process with a useful range of sonic alternatives.
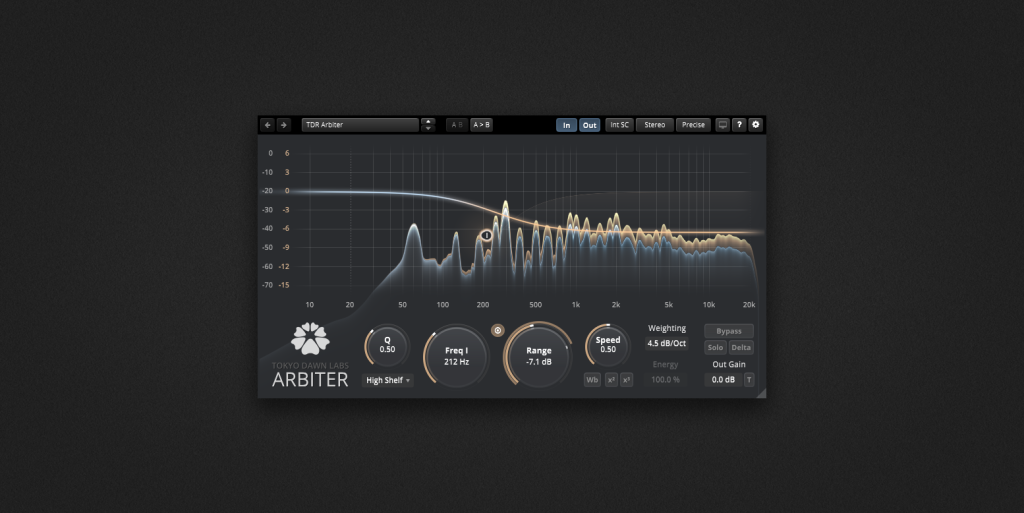
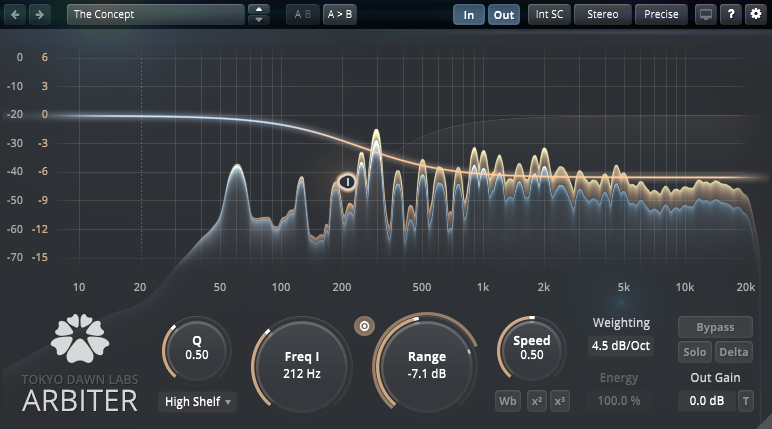
The plugin comes with a modern, freely resizable, full-screen capable user interface. A wideband spectral analyzer offers insight into the momentary filter magnitude and how it affects the signal from input to output.
Arbiter Controls
Filter Magnitude Display
The magnitude response of the filter is depicted by the bold curve.
To present the input and output spectra in an X-ray style, enable this feature.
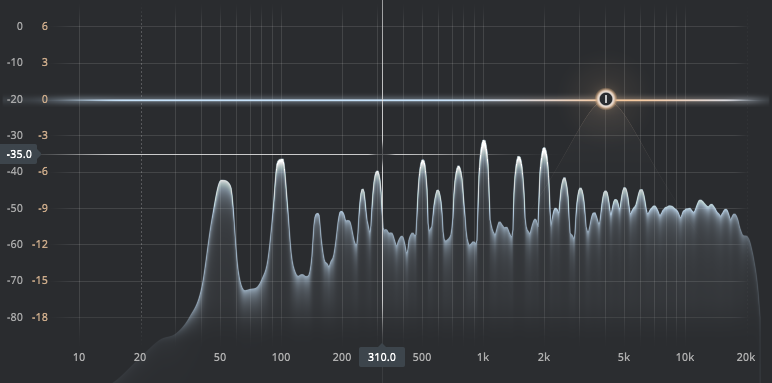
Click the display to freeze the animation and examine the spectrum in detail. This action reveals a crosshair, enabling a detailed examination of the spectrum
Band Handles
You have the flexibility to create up to three types of bands: bell, flat top, and traditional shelving shapes. Here’s an overview of the various handle types:
 | Bell band selected. |
 | Bell band not selected. |
 | Bell band bypassed. |
 | Bell band click and drag. |
 | Low Shelf band. |
 | High Shelf band. |
 | Flat Top band. |
Creating Bands
- To create a band, double-click on the display background. You can create up to three bands.
- To deactivate a band, double-click on its handle.
Selecting Bands
- Click on a band handle to select it.
Adjusting and Editing Bands
- Adjust the frequency and range by clicking and dragging a band handle.
- Use the scrollwheel to modify the Q/ERB width of the selected band.
- To bypass (or pass) the selected band, click the band handle using the wheel button (scrollwheel).
- Right-click on a band handle to cycle through the filter shapes.
- Alt-click a band handle to reset its range to 0.0 dB.
Q
 | The Q control sets the width of the selected filter shape. For the high shelf or low shelf bands, the Q control changes the Q of the shelving filter. Higher Q values represent steeper shelving curves, while lower Q values represent broader shelving curves. A Q value of 1 represents the sharpest overshoot free shelving curve. For the bell or flat top bell bands, the Q control changes the width of the filter around the center frequency. The bell and flat top bell are indicated as a fraction of ERB (Equivalent Rectangular Bandwidth). ERB is a concept used in psychoacoustics to approximate the bandwidths of filters in human hearing. This measure provides an estimate of how humans perceive the frequency spectrum of sound. |
Shape
The filter can be set to one of the following four shapes:
|
Freq
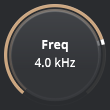 | This control sets the center frequency for the filter. |
Band On/Off
| This control bypasses (or passes) the selected band. Tip: If your mouse supports it, you can bypass (or pass) the selected band by clicking the band handle using the wheel button (scrollwheel). |
Range
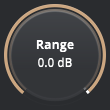 | This control sets the maximum modulation range of the process. Signal detection and gain reduction are not influenced by the absolute level. Therefore, sections with low levels are subjected to the same amount of gain reduction as those with high levels. This ensures uniform modulation across all signal levels. |
Speed
 | This control adjusts the detection and reaction speed of the algorithm. Higher values represent faster reaction times. |
Wideband (Wb)
| Modulation Target: Wideband This setting forces Arbiter to control the wideband signal instead of the specified band. This mode bypasses the audio filter, thereby preserving the phase response. The wideband mode tends to perform well with monophonic signals such as vocals or horns. In Wideband mode, exciters are not visible as they are not applicable in this context. |
Even (x2)
| Exciter: Even Harmonics This function replaces the low-frequency content attenuated by the band’s gain reduction with an even-numbered harmonic series. |
Odd (x3)
| Exciter: Odd Harmonics This function replaces the low-frequency content attenuated by the band’s gain reduction with an odd-numbered harmonic series. |
Weighting
 | This controls the spectral balance that Arbiter is trying to approximate. This global setting affects the detection of all bands. |
Energy
 | This setting scales the energy compensation produced by the Even and Odd harmonic generators. |
Bypass
| The Bypass function enables the input signal to pass through the plugin without undergoing any processing. |
Solo
| Solo enables you to monitor the band of interest, which could be the bell, high shelf, low shelf, or flat top. This feature allows you to hear the parts of the signal that Arbiter will balance against the wide band. |
Delta
| Delta outputs the difference between the input signal and the output signal. This allows you to hear only the processing changes of the signal in isolation. |
Out Gain
 | Out Gain sets the overall output signal level after processing. This gain can be used to compensate for level changes introduced by the gain reduction. |
Trim (T)
| Equal Loudness Trim This feature trims the output gain so that the output loudness matches the input loudness. Please note that the algorithm takes a few seconds to adjust. |
Toolbar

Undo/Redo
| Use the undo/redo buttons to recall previous/next parameter changes. The exact event is shown in a tool tip. Please note that certain parameter changes are not tracked by this function (e.g. “Bypass”). |
Preset Management
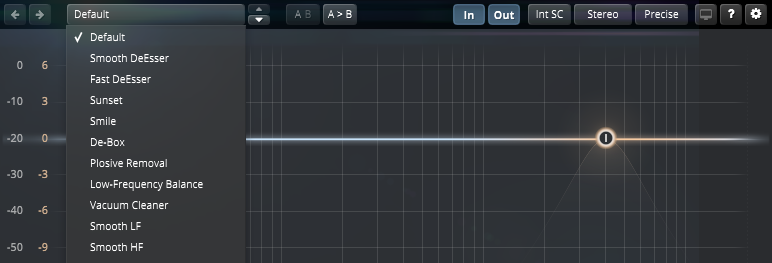
The preset drop-down list offers quick access to factory settings and user presets.
| The next/previous buttons allow you to cycle through the presets. |
Advanced preset management options are available from the context menu (Right-click).
Reset to Original state resets the currently active preset to its original state.
Save As New Global User Preset opens a dialog used to create User Presets. Note that these presets persist across sessions and DAWs (presets are saved on your machine). The total amount of user presets is limited to 20.
Overwrite/Rename Selected User-Preset allows to overwrite or rename presets.
Delete Selected User Preset allows to delete the current user preset.
Save As Default State replaces the plugins’ default preset with the current parameter state.
Revert Default State To Factory Setting deletes an overwritten default state.
Copy State (Ctrl+C) copies the current control states to the clipboard. This allows for applying control states (i.e. “presets”) across plugin instances and plugin hosts by using the Paste State command.
Paste State (Ctrl+V) pastes the control states from the clipboard.
Share State opens a dialog with additional preset sharing options via e-mail or internet forums.
A/B Control
| A/B allows to compare two alternative parameter states. |
| A>B and B<A copies one state to the other. |
Analyzer
| In shows the input spectrum. |
| Out shows the output spectrum. |
Sidechain Input

Int SC switches between the internal sidechain input and the external sidechain input. This can be used to “duck” one track by another. You’ll also need to route the external sidechain signal to the plugin sidechain input when:
- Routing external sidechain signals to plugin inputs 3/4 in stereo or to input 2 in mono (VST 2).
- Enabling the external sidechain input on the native DAW toolbar of the plugin window, which allows for using the sidechain routing capabilities provided by the DAW (VST3/AU/AAX).
In external sidechain mode, the analyzer “In” button renames to “SC” and the input analyzer shows the sidechain’s input spectrum.
| Important (Pro Tools only): The sidechain button displays as inactive when no external sidechain signal (key input) is selected. The sidechain button becomes active once the key input has been selected. |
Stereo Configuration

The audio input can be processed in various channel modes:
- Mono processes the left channel only. The right output channel will be the same as the left output channel.
- Stereo processes the left and right channels.
- Sum Diff processes both the sum and difference channels (often referred to as M/S processing).
- Sum processes the sum of the left and right channels (often referred to as Mid or M channel) and leaves out the difference between the left and right channels (often referred to as Side or S channel) unprocessed.
- Diff processes the difference between the left and right channels and leaves the sum of the channels unprocessed.
- Left processes the left channel only and leaves the right channel unprocessed.
- Right processes the right channel only and leaves the left channel unprocessed.
- Dual Mono processes the left and right channels independently.
| Important: The Stereo Configuration button displays as inactive when the plugin is inserted on a mono or multi-mono track. This feature is not supported in all hosts. |
Processing Quality

Arbiter offers three different processing quality modes:
- Eco – An economic CPU efficient mode used when CPU processing is limited.
- Precise – The default high fidelity processing mode.
- Insane – A very high quality processing mode.
Fullscreen Mode
| This button enables the plugin’s interface to expand to full screen, facilitating precise adjustments and providing a more detailed view of the Filter Magnitude Display. To exit Fullscreen Mode, either press the Escape key or click the Fullscreen button again. |
Help
| The dynamic help mode offers detailed information about the various elements of the user interface. Click “?” to activate the online help and move the mouse cursor over the control of interest. A small info bubble will appear displaying the function and details of the item. |
Settings
| The settings button opens a dialog which gives control over additional plugin options. |
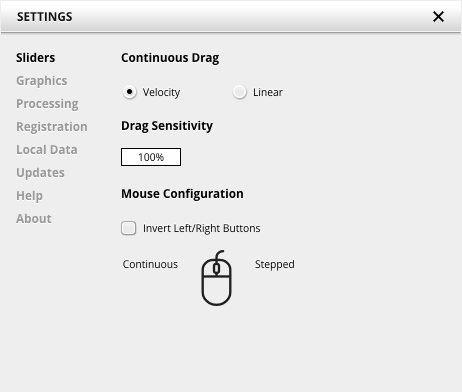
Slider allows for changing the behavior of knobs and control points in response to the mouse. Under Continuous Drag, knob and controller movement relies on mouse speed when Velocity is enabled. When Linear is enabled, knob and controller movement is proportional to mouse movement. Drag Sensitivity sets the linear sensitivity of the knob and controller movement further.
Plug-in controls, knobs, and control points can be adjusted using Left-click & drag (Continuous) and Right-click & drag (Stepped) by default. Mouse Configuration swaps the Continuous and Stepped behaviors between the left and right mouse buttons when selecting Invert Left/Right Buttons. Note that the default stepped values can be customized via the product configuration file. See “Local data” below for instructions on how to access this file.
Graphics allows for changing the interface size to a fixed percentage value between 100%, 125% and 150%.
Processing shows the plug-in latency and sample rate details. Highest quality rendering enables the option to always render at the highest Processing Quality, no matter what type is enabled in the Toolbar. See the “Processing Quality” subchapter for more details on these modes.
Registration offers access to offline and online product registration options. See the “Product Registration” chapter for more information.
Local Data allows for exporting and importing user preferences, presets, and keys, to and from other systems. Local data can also be deleted for all Tokyo Dawn Labs plug-ins using the Trash button.
In addition, the Folder button opens the Tokyo Dawn Labs local data folder containing all configuration files and keys. Note that these operations affect all TDR plug-ins, and not just SimuLathe REF.
Updates allows to Check for updates and to Download latest version. Automatic Lookups can be enabled to Check for updates (once per day).
Help contains Documentation and Support links.
About shows the version number, build date, format, credits, and other information.
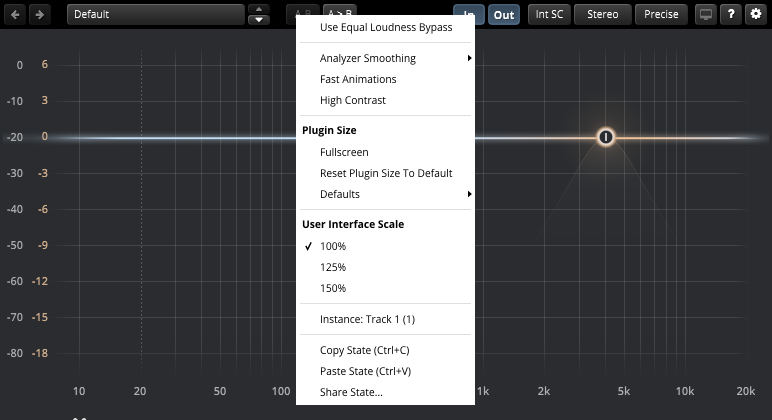
Context Menu
Standard Context Menu
Additional options can be accessed using the standard context menu. This can be opened by Right-clicking on a blank area anywhere in the UI. A click outside of the menu closes it.
Use Equal Loudness Bypass
This feature enables a loudness-compensated bypass. When selected, the bypass signal undergoes gain compensation to match the output loudness of the processor. When enabled, the “Bypass” button is renamed to “EL Bypass” (short for Equal Loudness).
Analyzer Smoothing
The Analyzer Smoothing feature offers three options. It allows you to adjust the response of the spectrum animation.
Analyzer Smoothing: Raw
No smoothing is applied with this setting.
Analyzer Smoothing: 1/12 oct
Mild smoothing is applied.
Analyzer Smoothing: 1/3 oct
Moderate smoothing is applied.
Fast Animations
This feature accelerates the spectrum animation in the Filter Magnitude Display.
High Contrast
This option slightly darkens the background of the user interface.
Plugin Size
Plugin Size provides additional options for adjusting the interface size of the plugin:
Plugin Size: Fullscreen
This feature allows the plugin’s interface to expand to full screen. To exit Fullscreen, you can select ‘Exit Fullscreen’ from the Context Menu, press the Escape key, or click the Fullscreen button on the Toolbar.
Plugin Size: Reset Plugin Size To Default
This allows you to revert the interface size of the plugin to its original setting, as defined under Defaults.
Plugin Size: Defaults
This option provides two additional settings:
- Use This Plugin’s Size As New Default: This setting allows you to set the current size of the plugin as the new default size.
- Revert To Factory Settings: This setting allows you to restore the plugin size to its original factory settings.
These options provide flexibility in customizing the plugin’s interface size according to your preferences.
User Interface Scale
User Interface Scale sets the on-screen interface size to a fixed percentage value of 100%, 125%, or 150%.
Instance
Instance allows for renaming the specific plug-in instance.
Copy State (Ctrl+C) copies the current control states to the clipboard. This allows for applying control states (i.e. “presets”) across plugin instances and plugin hosts by using the Paste State command.
Paste State (Ctrl+V) pastes the control states from the clipboard.
Share State opens a dialog with additional preset sharing options via e-mail or internet forums.
Adjusting Plugin Controls
Resetting Controls to Default Preset Values
Any control can be reset to its default preset position and value. This default position is the value that is set in the Default preset.
 | To reset a rotary control:
|
Modifying Controls Using Text Entry
Many of the displayed control values have text boxes that can be modified directly.
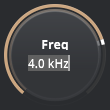 | To modify control values using text entry:
|
Plugin Window Resize
| Adjust the interface size of the plugin by clicking and dragging the resize handle. |
Copyright and Acknowledgements
Idea and development by Vladislav Goncharov and Fabien Schivre
Documentation by Shane Johnson
Product evaluation and quality control by:
Ady Connor
Aleksi Vuolevi
Andrew Boult
Audiobomber | Castlemastering
Bob Olhsson
Cyril Meysson
Dax Liniere | Puzzle Factory
Dean
Dennis J Wilkins | Studio 12 Below
Diogo C. Borges
Eric Recourt
EvilDragon
Greg Reierson
Gregg | Hermetech Mastering
Helmut Erler
Ilya Orlov
Janne Hatula
Jean Dante
Jeffrey Rippe
Jerry Anthony Mateo
Joe Caithness Mastering
Joseph Lyons
Justin Perkins
Laurent Sevestre
Michael Wynne
Miro Pajic
Murray Campbell | Beatworld
Niklas Silen
Nil Hartman
Pete Grandison
Resoundsound Mastering
Rich Prewett
Richard Pentrose
Robi Bulesic
Roland Löhlbach
Ruairi O’Flaherty
Sean Diggins
Sergey Makeev
Thaddeus Moore | Liquid Mastering
Titanio Studios
Valentin Zvukofor
Vitaly Zolotarev
Copyright © Tokyo Dawn Records. All rights reserved.
All other product and company names are trademarks or registered trademarks of their respective holders.

