TDR VOS SlickEQ is a mixing/mastering equalizer designed for ease of use, musical flexibility and impeccable sound. Three (and a half) filter-bands arranged in a classic LOW/MID/HIGH semi parametric layout offer fast and intuitive access to four distinct EQ modes, each representing a set of pre-defined EQ curves and behaviors.
In order to “warm up” the material with additional harmonic content, SlickEQ offers a switchable EQ non-linearity and an output stage with various saturation models. These options are meant to offer subtle and interesting textures, rather than obvious distortion. The effect is made to add the typical “mojo” often associated with high quality analogue audio gear.
An elaborate auto gain option automatically compensates for changes of perceived-loudness during EQ (within reasonable limits) and a gain-trim feature helps controlling peak overloads with ease.
The 64bit multi-rate processing scheme (a.k.a. “oversampling”) practically eliminates typical problems of digital EQ implementations such as frequency-warping, quantization distortion and aliasing.
Beside the primary controls, the plug-in comes with an array of additional helpers: Advanced preset management, undo/redo, quick A/B comparison, copy & paste, an online help, editable labels, mouse-wheel support and much more. Finally, SlickEQ allows to exclusively process the stereo sum or stereo difference without additional sum/difference encoding (see “M/S” microphony).
SlickEQ is a collaborative project by “Variety of Sound” (Herbert Goldberg) and “Tokyo Dawn Labs” (Vladislav Goncharov and Fabien Schivre).
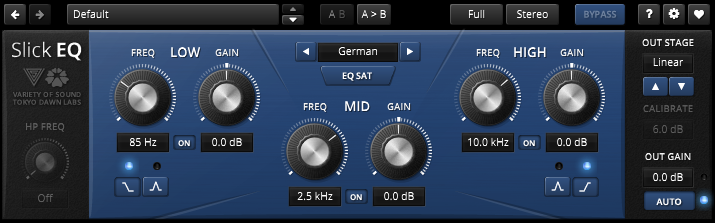
Main Controls
EQ Model
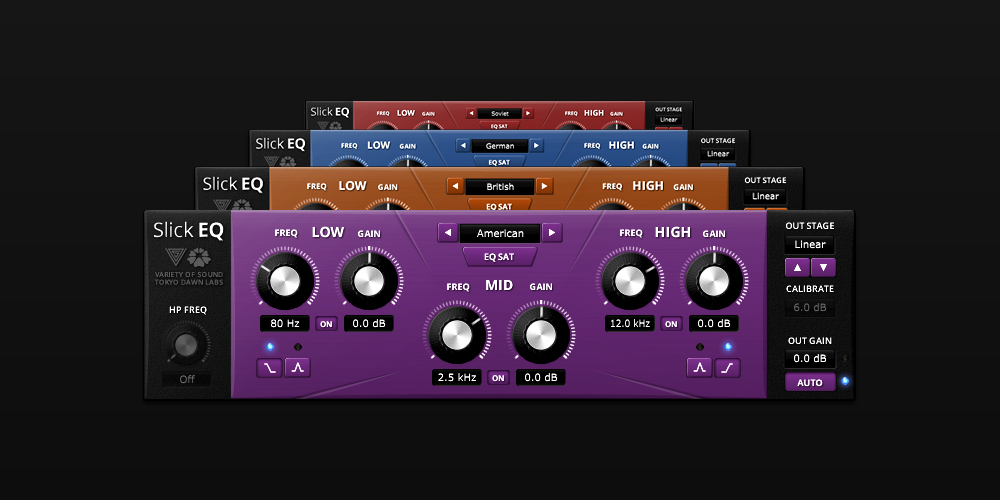
One of four different EQ models (curves and behaviors) can be selected via the central drop down menu or cycled through with the help of prev/next buttons. The interface’s background color changes depending on the selected model.
The models represent a specific set of curves and EQ behaviors each providing their own musical “feel”. The different names and colors have no deeper meaning, they are meant to help with memorization and identification of the different models.
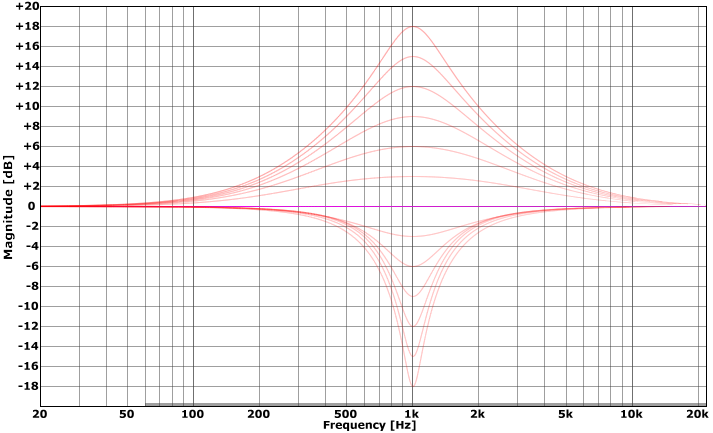
Model: American
Classy and gentle slopes, American style. Proportional Q design.
American model: Bell filter cut/boost range American model: Shelving filter(s) cut/boost range
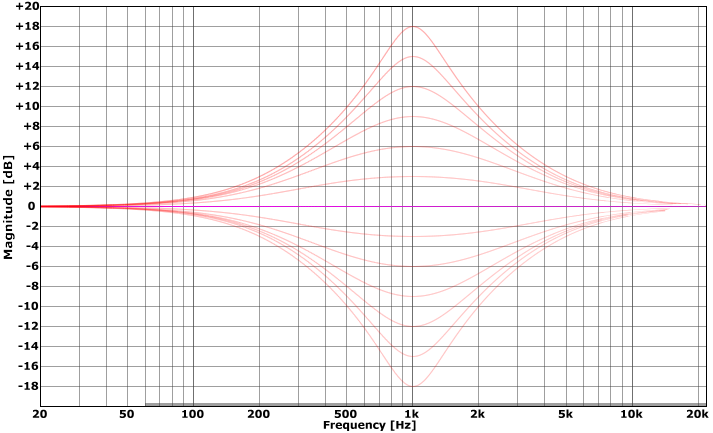
Model: British
Slightly steeper curves with more “grab” and a subtle shelving “dip”. A proportional Q design with distinct differences between boost and cut operations.
British model: Bell filter cut/boost range British model: Shelving filter(s) cut/boost range
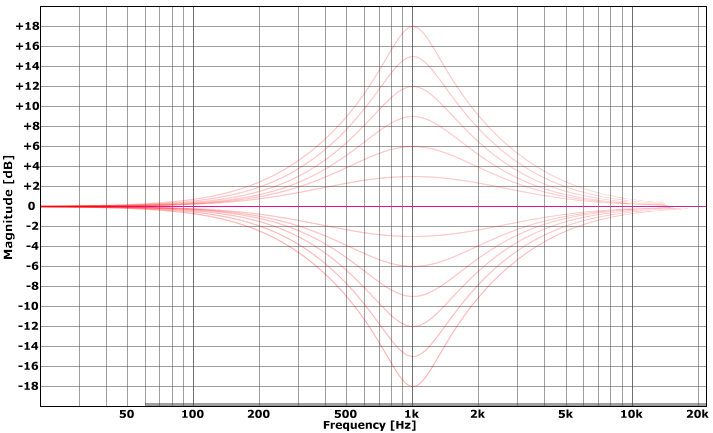
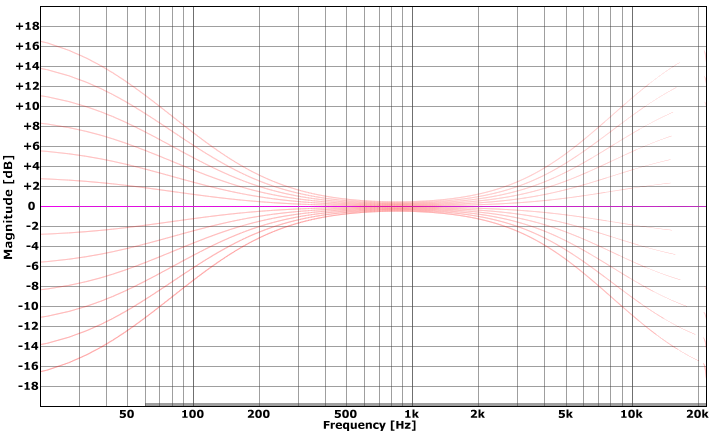
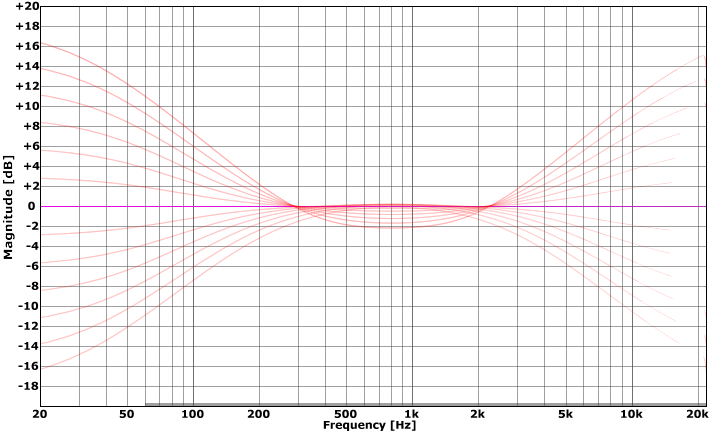
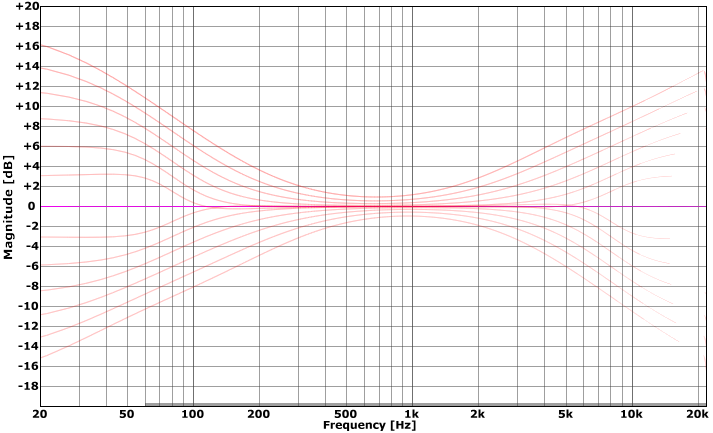
Model: German
Special “tilt” shelving filters with large linear transitions (at low amounts of boost/cut). Well suited for corrective duties or mastering tasks.
German model: Bell filter cut/boost range German model: Shelving filter(s) cut/boost range
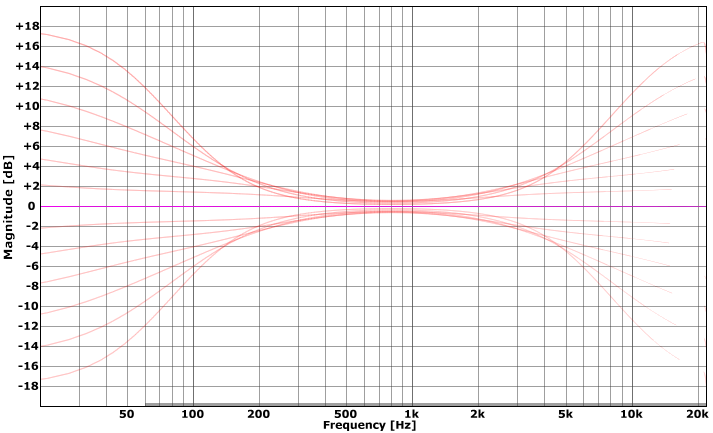
Model: Soviet
Unique inverse proportional curves with increasingly smooth curves as the gain is increased.
Soviet model: Bell filter cut/boost range Soviet model: Shelving filter(s) cut/boost range
EQ Saturation
The EQ SAT button activates a smooth non-linearity inside the filter network. This generates “musical” amounts of harmonic distortion, which purely affect EQ boosts. In other words, no EQ boost = no saturation.
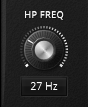
High Pass Filter
High-pass filter frequency controls an 18db/Octave Butterworth filter. To disable the filter, turn the knob fully counter-clockwise. The control will grey out to indicate its disabled state.
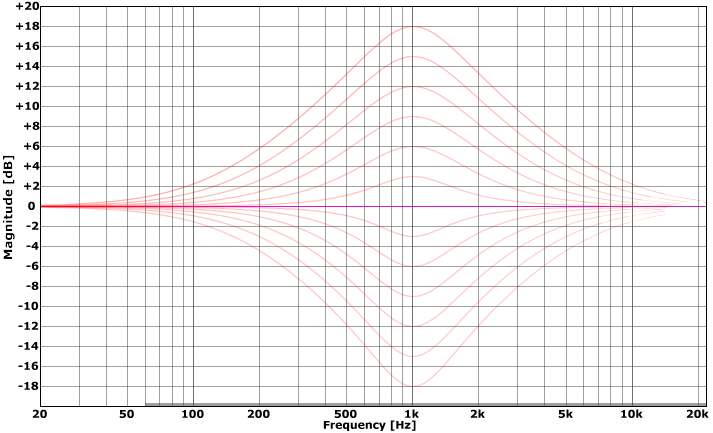
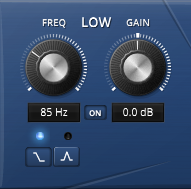
Low Frequency Band
The low-band section features low-shelving and bell shaped control over the low frequency region. Use the buttons at the bottom of the section to select an appropriate shape.
Frequency controls the center frequency of the selected filter-shape. Gain controls the amount of boost or reduction applied to the selected frequency region.
Note: The exact shape of the curve depends on the selected EQ Model, as well as on the selected corner frequency and gain.
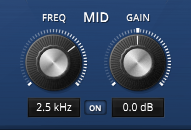
Mid Frequency Band
The mid frequency band consists of a bell shaped filter.
Frequency controls the center frequency of the bell. Gain controls the amount of boost or reduction.
Note: The exact shape of the curve depends on the selected EQ Model, as well as on the selected corner frequency and gain.
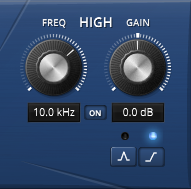
High Frequency Band
The high-band section features high-shelving and bell shaped control over the high frequency region. Use the buttons at the bottom of the section to select an appropriate shape.
Frequency controls the center frequency of the selected filter-shape. Note that SlickEQ offers a wide range up to 40 kHz. Gain controls the amount of boost or reduction applied to the selected frequency region.
Note: The exact shape of the curve depends on the selected EQ Model, as well as on the selected corner frequency and gain.
Output Stage
The output stage section offers access to five different models:
Linear: As clean as it gets, absolutely linear. Silky: Dynamic saturation with an “open” character. Generates low order, even and odd harmonics (average case). Mellow: Subtle warming. Generates a very low level odd order harmonics series with a dominant 3rd partial (average case). Deep: Dynamic odd order distortion with a distinct frequency dependent touch for increased depth and dimension. Funky: Input transformer behavior including magnetic hysteresis.
Calibrate allows to adjust the output stage model “drive” in decibel. It gives control over the amount of generated harmonic content without the need to use clumsy input/output drive techniques.
Output Gain and Auto Gain
Output gain adjusts the output gain in decibel. A red overload-hold LED activates whenever the output signal exceeds 0dBfs, and remains active until re-set. The max-peak history is automatically reset as soon an as audio parameter changes. A left-click on the LED forces a re-set manually.
Holding the mouse-cursor over the overload LED enables a secondary output gain trim mode which shows the difference between 0dBfs and the current max peak history value. A left click on the trim display sets the output gain as indicated (which practically “normalizes” the plug-in’s output gain). Any click outside the region disables the trim mode again.
The AUTO button activates the auto-gain mode. This mode tries to preserve the subjective loudness during EQ while operating the EQ. This mode gives a much better idea of what the EQ is really doing to the material, because it strongly reduces perception issues related to gain differences. In other words, boosts don’t automatically give the impression to sound better and cuts tend to sound far less “boring” than they seem without auto-gain (or careful manual loudness matching). A blue LED indicates auto-gain activity.
Toolbar
Undo/Redo
The undo/redo buttons allow recalling previous parameter states. The exact event is shown in a tool-tip. Note that certain controls are not tracked by this function (e.g. “Bypass”).
Preset Management
The preset drop-down list gives quick access to factory and user presets. Alternatively, up/down buttons allow to cycles through them.
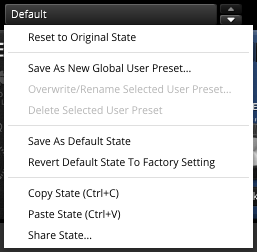
The context menu (right-click) to offers several preset related options:
Reset to Original state re-sets the preset to its original state.
Save As New Global User-Preset opens a dialog used to create User Presets. These presets persist across sessions and DAWs (presets are saved on your machine). Similarly, you can also overwrite or rename presets by selecting “Overwrite/rename Selected User-Preset”.
Save As Default State replaces the plugins default preset with the current parameter state.
See section“Context Menu”below for details about the Copy/Paste/Share State options.
A/B Control
A/B allows to quickly compare two alternative control settings. A>B or B<A copies one state to the other.
Quality
SlickEQ supports two quality modes:
Full SlickEQ’s high quality processing mode.
Eco Economic and low latency mode. Note that “Eco” disables all nonlinearities such as EQ Sat and OutStage.
Live A zero latency mode.
Note that any change of quality mode also affects plugin latency. It is probable that the plugin-host playback requires to be reset (stop>play) in order to refresh latency compensation.
Process-Target
The plugin can be processed in Stereo, Mono, Left, Right, Sum and Diff mode. Sum and Diff represents Mid/Side processing.
Bypass
Bypasses the whole processor. Processor latency is accurately compensated and the actual processing is never interrupted (gap-less) to enable better comparisons.
Help Mode
The online help mode offers detailed information about the different elements of the user-interface. Click the “?” button to activate the online help mode and move the mouse-cursor above the control of interest. A mouse-click closes the help-mode again.
Settings
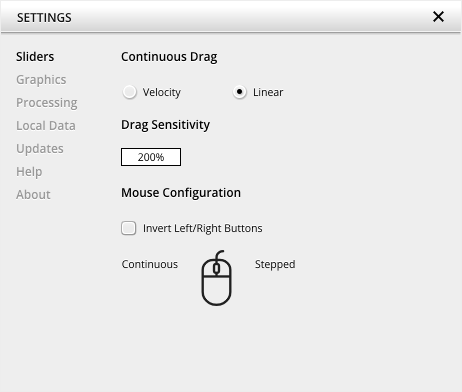
The settings button opens a dialog which gives control over additional plugin options.
Sliders allows for changing the behavior of knobs and control points in response to the mouse. Under Continuous Drag,knob and controller movement relies on mouse speed when Velocity is enabled. When Linear is enabled, knob and controller movement is proportional to mouse movement. Drag Sensitivity sets the linear sensitivity of the knob and controller movement further.
Plug-in controls, knobs, and control points can be adjusted using Left-click & drag (Continuous) and Right-click & drag (Stepped) by default. Mouse Configuration swaps the Continuous and Stepped behaviors between the left and right mouse buttons when selecting Invert Left/Right Buttons. Note that the default stepped values can be customized via the product configuration file. See “Local data” below for instructions on how to access this file.
Graphics allows for changing the interface size to a fixed percentage value between 100%, 125% and 150%.
Processing shows the plug-in latency and sample rate details. Highest quality rendering enables the option to always render at the highest Processing Quality, no matter what type is enabled in the Toolbar. See the “Processing Quality” subchapter for more details on these modes.
Registration offers access to offline and online product registration options. See the “Product Registration” chapter for more information.
Local Data allows for exporting and importing user preferences, presets, and keys, to and from other systems. Local data can also be deleted for all Tokyo Dawn Labs plug-ins using the Trash Can button.
In addition, the Folder button opens the Tokyo Dawn Labs local data folder containing all configuration files and keys. Note that these operations affect all TDR plug-ins, and not just TDR Limiter 6 GE.
Updates allows to Check for updates and to Download latest version. Automatic Lookups can be enabled to Check for updates (once per day).
Help contains Documentation and Support links.
About shows the version number, build date, format, credits, and other information.
SlickEQ Gentleman’s Edition Upgrade
This button opens the SlickEQ Gentleman’s Edition product page on the Tokyo Dawn Website in your default browser. For more detailed control over processing, please consider upgrading to the enhanced SlickEQ Gentleman’s Edition.
Context Menu
Standard Context Menu
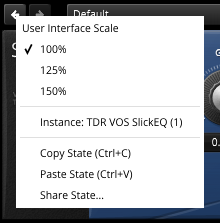
Additional options can be accessed using the standard context menu. This can be opened by right-clicking on a blank area anywhere in the UI. A click outside of the menu closes it.
User Interface Scale sets the on-screen interface size to a fixed percentage value of 100%, 125%, or 150%.
Instance allows for renaming the specific plug-in instance.
Copy State (Ctrl+C) and Paste State (Ctrl+V) allows copying control states (i.e. “presets”) across plugin instances and
plugin hosts. Share State opens a dialog with additional preset sharing options via e-mail or internet forums.