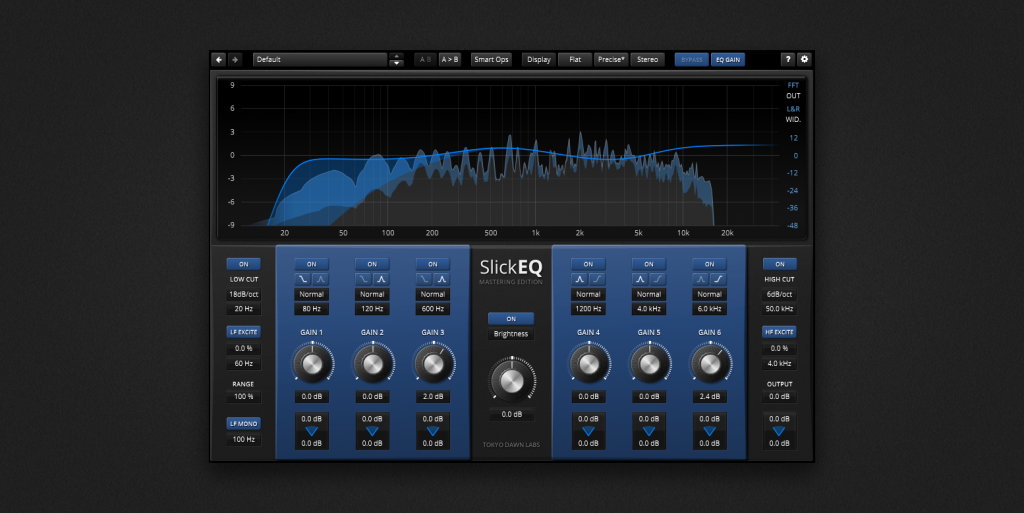
The Concept
TDR SlickEQ – M (Mastering Edition) extends SlickEQ’s proven concept into a fully-fledged stereophonic equalizer. Specifically developed for the audio mastering engineer, no compromises have been made to deliver exceptional musical flexibility free of negative side effects.
Behind an intuitive user interface hide a staggering array of possibilities: A set of musical high-pass and low-pass filters, including a low frequency “monoization” section, offer detailed control over the signal bandwidth. Six powerful parametric filter bands give detailed control over tone, timbre and the stereo image, and a sophisticated meta-filter offers direct and intuitive access to the brightness, hardness or equal loudness curve of a music signal.
An effective auto gain mechanism automatically compensates for changes of perceived loudness while operating the EQ. In addition, intelligent signal analysis options allow matching the input signal’s spectrum against a pink noise reference; or automatically setting the HP and LP filters according to the signal’s audible bandwidth. All filters except HP and LP operate in a parallel EQ configuration.
As per previous SlickEQ editions, a multirate processing scheme (a.k.a. “internal resampling”) combined with elaborate signal processing techniques ensure the highest signal integrity is maintained throughout the processing.
Equalization in Audio Mastering
Mastering is an important bridge between art and engineering. Being primarily an effort in communication, listening and quality control, mastering also represents the last opportunity to correct, optimize and sweeten a recording before mass distribution. The equalizer is probably the most important sound shaping tool during this process, and mastering engineers often spend a notable amount of time with them rebalancing and matching songs into something bigger.
The correction of mixes typically involves a new balancing of tone, timbre and stereo image. The most obvious approach in this case is the use of a dual mono equalizer to process the left and right channels independently. This offers detailed spectral control over the stereo balance, and to some extent, stereo width. M/S encoding/decoding schemes represent an interesting alternative, as they turns any L/R equalizer into a M/S equalizer directly affecting the sum (M) and difference (S) signal independently. The latter has become common practice for frequency specific stereo widening or narrowing.
Another common task in audio mastering is bandwidth control. Mastering equalizers often include a high-pass filter to prevent any DC offset or control low frequency content to prevent further issues down the playback chain. Low-pass filters are less common in music mastering, mostly due to the fact that most analogue processors and analogue media in particular, are low-pass filters on their own. But the artificial reduction of high frequencies still has its uses. Be it for the prevention of ultrasonic content reaching the playback chain or calming an overly bright mix.
Mastering equipment is primarily designed to preserve signal fidelity. This is guaranteed by the use of low distortion, low-noise components and minimal signal paths, often only achievable with stepped control. Reliability represents another important aspect, as is the ability to easily recall previous session. Therefore, analogue mastering equalizers traditionally feature stepped controls for frequency, Q and gains, as they both facilitate recalls and manufacturing.
While these facts explain why stepped control can a beneficial “restriction” in the analog world, there is another aspect having validity in the digital world: Stepped controls relax the decision process. They free the time for better artistic decisions.
SlickEQ M (Mastering Edition) has been specifically designed to cover all these demands, and more!
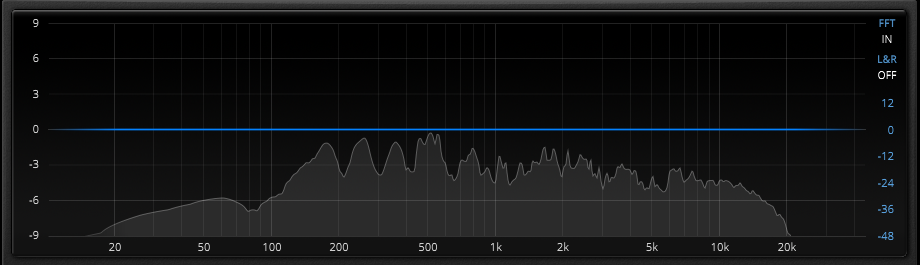
Frequency Magnitude Display
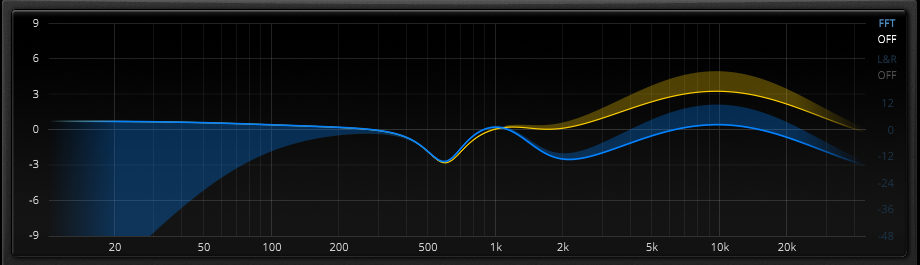
A display showing the frequency magnitude of the equalizer can be show/hidden via the “Display” button found in the toolbar.
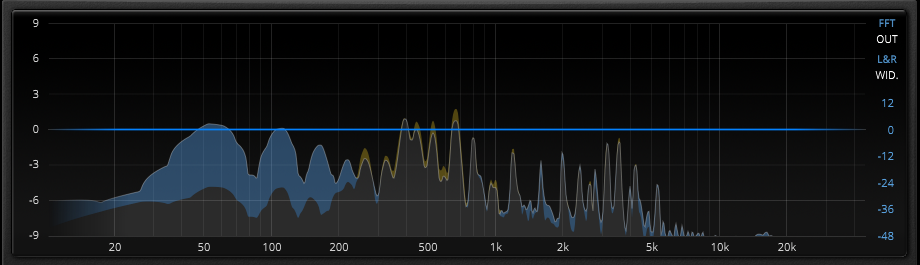
The blue curve represents the left stereo channel, while the orange curve represents the right channel.
Half transparent blue or orange areas extending above their solid curve represent an increase in stereo width, while areas extending below the solid curves represent a narrowing of the stereo width.
Equalizer Frequency Magnitude Ruler
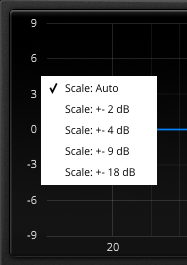 | This ruler describes the extent of the main equalization curves (the frequency magnitude, width, and balance applied by the equalizer). The ruler will automatically adapt to fit the given curves into the visible area by default. Click the ruler to cycle through the scales and modes, or right-click to open the selection menu. |
Analyzer Frequency Magnitude Ruler
 | This ruler describes the extent of the analyzer curves (the signal’s own frequency magnitude, width, and balance, depending on the selected mode). Click the ruler to cycle through the scales and modes, or right-click to open the selection menu. |
Spectrum Analyzer Source
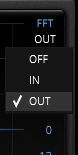 | SlickEQ M’s analyzer can be connected to various sources. · Off: Disables the analyzer. · In: Analyzer follows the plugin’s input. · Out: Analyzer follows the output. |
Spectrum analyzer enabled:
Stereo Analysis
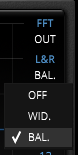 | SlickEQ M’s stereo analysis can display various sources. · Off: Displays the mono content. · Wid.: Displays the stereo width content. · Bal.: Displays the stereo balance content |
In “Width” mode, a positive stereo correlation is indicated in blue, negative correlation in orange.
Band Controls
Band On/Off
 | Turns the equalizer band on and off. |
Band Shape
 | Switches between bell and shelving filter shapes. Band 1, 2 and 3 offer low shelving filters, while band 4, 5 and 6 feature high shelves. The exact shape will depend on band steepness (see below). |
Band Steepness (Q)
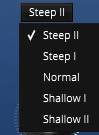 | The equalizer band filters have a gain and frequency dependent Q. The steepness control allows varying the default steepness over five steps (i.e. making the curve either shallower or steeper). |
Band Frequency
 | This slider specifies the corner frequency (in case of shelf shapes) or center frequency of the filter band. Band 1, 2 and 3 are specifically meant to control the low to mid frequencies, while band 4, 5 and 6 have been optimized for high frequency manipulation. |
Band Gain
 | Controls the amount of gain applied to the band (left and right channels are equally affected). Note that the “EQ Scale” control below allows for rescaling all band gain controls at once without affecting the gain ratio between each. |
Band Stereo Control
 | The stereo display offers direct access to stereo width and stereo balance of the given band (over the shape of the filter). The effect is independent from the main gain control and is generally not affected by any filter nonlinearity. The upper text slider adjusts the stereo width of the band. This is technically equivalent to an EQ affecting the stereo difference signal only. The lower text slider controls the stereo balance of the band. This is technically equivalent to a dual mono EQ having different gain values for left and right. Weighting follows equal power pan law. In addition, a specialized phase compensation network prevents cases having contradictory intensity-stereo vs time-stereo. The stereo rectangle indicates the amount and type of stereo manipulation, double clicking it resets both width and balance controls to zero. [i] You can affect the stereo sum (“mid”) by reducing the width and applying the opposite change to the band gain. [i] Engineers familiar with Sum/Difference (i.e. “M/S”) encoding trickery might have noticed that both filter frequency and steepness parameters are forced to remain equal for both channels. This is an intentional restriction that ensures excessive timing disparities between the sum and difference channels are avoided. [i] SlickEQ M’s equalization capabilities are based on so called min-phase response filters, as known from analogue signal processing. A problem appears as soon one tries to accurately balance the stereo image by using different band gain values the Left (L) and right (R) channels. Stereo perception is based both on interaural intensity differences (different gain between left and right) and interaural time differences (delay between left and right). A surprisingly little known fact is that all min-phase filters not only affect the gain and frequency, but inevitably also delay certain frequencies in the signal more than others. By EQing the left and right channels of a stereo signal independently, this delay can also generate contradictory stereo information, resulting in a blurred, unnatural stereo image. SlickEQ M prevents these issues with an elaborate phase compensation network that is automatically switched in as needed. |
Meta Filter Controls
Meta Filter On/Off
 | Turns the meta-filter band on and off. |
Meta Filter Type
 | The meta-filter offers three specialized curves: · Brightness Generates a linear “tilt” shape. This filter type allows direct control over the darkness or brightness of an audio signal, while maximally preserving ratios between the instruments of a mix. · Hardness A special filter network providing direct control over the subjective softness or hardness of an audio signal. This effect is best discovered by listening. · EL Curve (Equal Loudness Curve) allows you to manipulate the spectrum as a function of sound pressure level. [i] Equal loudness contour shapes are dependent on sound pressure levels. This quickly becomes obvious when comparing works that have been mixed at varying monitoring levels. Low monitoring levels typically produce stronger low and high frequency regions, while high monitoring levels tend to create more mid-frequency focused results. The EL Curve can compensate for these effects and greatly simplify the mastering, especially for material that has been produced in different places. |
Meta Filter Amount
 | Adjusts the amount or extension of the selected meta filter curve. The exact meaning of this parameter depends on the selected meta filter shape: · Brightness: dB per decade · Hardness: No technical meaning · EL Curve: One dB is roughly equivalent to the (spectral) effect a 2dB change in sound pressure level will produce. |
Left Side Controls
Low Cut Filter On/Off
 | Turns the lowcut filter on and off. |
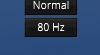
Low Cut Filter Slope
 | The lowcut filter supports four different slopes, each featuring a subtle “bump”: · 6dB/oct · 12dB/oct · 18dB/oct · 24dB/oct |
Low Cut Filter Frequency
 | This slider adjusts the lowcut filter’s cutoff frequency (-3dB point). |
LF Exciter On/Off
 | Enables the low frequency exciter. SlickEQ M’s exciters have been specifically designed to be used on stereo mixes. They can enrich and solidify the signal by lifting low level passages and introducing harmonic distortion. The LF Exciter mostly produces symmetrical distortion (odd numbered harmonics), while keeping largely nonharmonic inter-modulation distortion at a greater distance than conventional exciters do. Alt + click turns both LF and HF exciters on and off. Note: Right-clicking this button opens a menu giving access to the legacy LF nonlinearity control found in version 1.x.x and earlier. Sessions and presets created using the original LF EQ Nonlinearity will open using HF SAT legacy. |
LF Exciter Amount
 | This controls the strength of the low frequency exciter. |
LF Exciter Frequency
 | This controls the corner frequency of the low frequency exciter. It can extend down to very low frequencies like a low shelf filter. |
LF EQ Nonlinearity On/Off (Legacy)
 | Enables filter nonlinearities for the low frequency band section (band 1, 2 and 3). Alt + clicking the LF SAT button switches both LF and HF nonlinearities on and off. |
LF EQ Nonlinearity Amount (Legacy)
 | Controls the strength of the nonlinearity affecting the low frequency section’s EQ filter operations. Note: With band gains at zero, no saturation is added. |
EQ Range
 | Scales all EQ gain parameters while preserving the ratios between each. This parameter basically allows reducing or increasing the extension EQ curve. This operation affects both EQ band gains and meta filter amount. Double click the label to switch to an EQ SCALE mode affecting the band gains only. |
LF Mono On/Off
 | Switches the LF mono filter (low frequency monoizer) on and off. [i] This special filter originates from the vinyl cutting process and is sometimes called an “Elliptical filter”. It increasingly reduces the stereo width towards low frequencies. This is not to be confused with the Elliptic filter, an alternative description of Cauer filters (which really don’t have many uses in audio). |
LF Mono Frequency
 | This slider adjusts the “LF Mono” filter’s cutoff frequency. Content below this frequency gradually becomes mono (i.e. loses its stereo information). |
Right Side Controls
Highcut Filter On/Off
 | This button switches the highcut filter on and off. |
Highcut Filter Slope
 | The highcut filter supports four different slopes: · 6dB/oct · 12dB/oct · 18dB/oct · 24dB/oct [i] All highcut filters follow the Bessel specification to keep the phase distortion low over the passband). |
Highcut Filter Frequency
 | This slider allows adjusting the highcut filter’s cutoff frequency (-3dB point). In order to allow for subtle bandwidth control, the corner frequency can be specified up to 60kHz. |
HF Exciter On/Off
 | Enables the high frequency exciter. SlickEQ M’s exciters have been specifically designed to be used on stereo mixes. They can enrich and solidify the signal by lifting low level passages and introducing harmonic distortion. The LF Exciter produces a strong amount of asymmetric distortion (and thus, introduces both even and odd numbered harmonics), while keeping largely nonharmonic inter-modulation distortion and aliasing products at a greater distance than conventional exciters do. Note: Right-clicking this button opens a menu giving access to the legacy HF nonlinearity control found in version 1.x.x and earlier. Sessions and presets created using the original HF EQ Nonlinearity will open using HF SAT legacy. |
HF Exciter Amount
 | This controls the strength of the high frequency exciter. |
HF Exciter Frequency
 | This controls the corner frequency of the high frequency exciter. It can extend up to very high frequencies like a high shelf filter. |
HF EQ Nonlinearity On/Off (Legacy)
 | Enables filter nonlinearities for the high frequency band section (band 4, 5 and 6). Alt + clicking the HF SAT button switches both LF and HF nonlinearities on and off. |
HF EQ Nonlinearity Amount (Legacy)
 | Controls the strength of nonlinearity affecting the high frequency section’s EQ filter operations. Note: The total amount of added harmonics depends both on the nonlinearity amount parameter and the band gain extension. With band gains at zero, no harmonics are added. |
Output Gain
 | Controls the output gain of the equalizer. |
Output Stereo Control
 | The output stereo display offers direct control over stereo width and stereo balance of SlickEQ M’s output. The upper text slider controls the stereo width of the output. This is technically equivalent to an amplification of the stereo difference signal. The lower text slider controls stereo balance of the output. This is technically equivalent to having different gain values for left and right. Weighting follows equal power pan law. The stereo rectangle indicates the amount and type of stereo manipulation, double clicking it resets both width and balance controls to zero. |
Toolbar
Undo/Redo
| Use the undo/redo buttons to navigate to previous control states. The exact event is shown in a tool-tip. Note that certain controls are not tracked by this function (e.g. “Bypass”). |
Preset Management
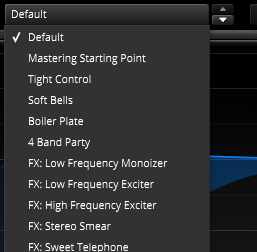 | The preset drop-down list offers quick access to factory settings and user presets. Alternatively, the up/down buttons allow you to cycle through the presets. Note that some presets represent “flat” starting points, while others prefixed “FX: ” demonstrate certain features and techniques. |
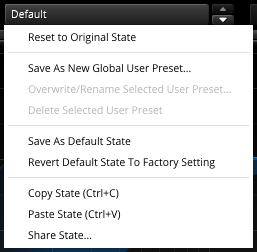 | Advanced preset management options can be accessed from the preset bar’s context menu (right-click): Reset to Original state re-sets the preset to its original state. Save As New Global User preset opens a dialog used to create User Presets. These presets persist across sessions and DAWs (presets are saved on your machine). The total amount of user presets is limited to ten. Save As Default State replaces the plugins’ default preset with the current parameter state. Revert Default State To Factory Setting deletes an overwritten default state. See section“Context Menu”below for details about the Copy/Paste/Share State options. |
A/B Control
| A/B allows comparing between two alternative control settings. A>B or B<A copies one state to the other. |
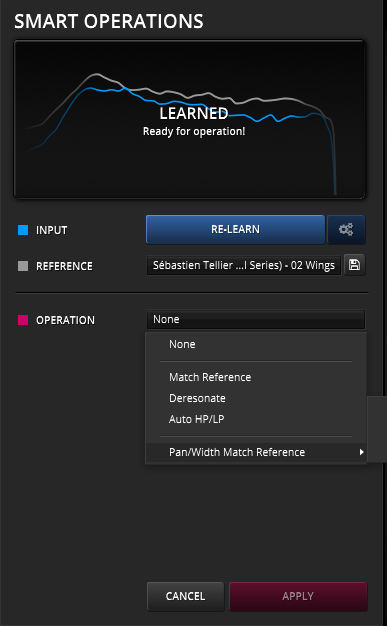
Smart Ops
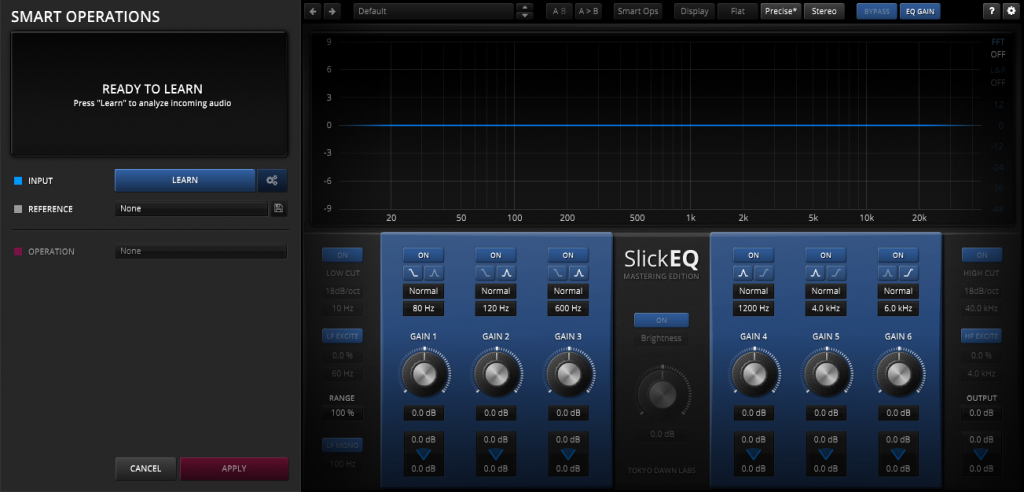
Smart Operations analyze the audio input’s spectral properties and allow running Operations in dependence of this information. The system internally searches for the optimal SlickEQ M parameter settings for the case at hand, and sets SlickEQ M’s parameters accordingly.
Operations cover a wide array of applications: Spectral matching against primitive or external references, detection and removal of static resonances, filter configuration tasks and more. Operations can be fine-tuned toward a specific FREQUENCY RANGE and total AMOUNT (both negative to positive).
Workflow
- INPUT
LEARN button starts/stops analyzing a certain section of plugin audio input. - REFERENCE (optional)
Loads an internal or external reference, as required by certain operations (e.g. Spectral Match). - OPERATION
Specifies the operation type. Note: Without active REFERENCE, some options will be inactive. Load a REFERENCE to activate them. - APPLY/CANCEL
Applies the current operation and closes the SmartOps view,
or cancels the current operation, reverts to the previous plugin state and closes the SmartOps view. - FINE TUNE
The final step intentionally involves manual fine tuning of the generated parameter settings.
Smart Operations is a flexible tool that allows generating complex signal-aware presets for SlickEQ M. It has been designed to act like a human assistant: Taking care of tedious repetitive work, until handed over to the engineer for final verification and fine-tuning. An assistant isn’t always perfect, he usually needs supervision.
Following this analogy, Smart Ops are not meant to replace the engineer’s creativity. In the best case, they will save time, and certainly inspire!
Interface
| Smart Operations can be launched by clicking the SMART OPS button found in the plugin toolbar. |
The plugin window expands, and the SmartOps panel appears. The regular UI darkens, and can no more be controlled directly. Any Click on the darkened section will CANCEL the current operation and close the SmartOps panel. This is true with exception of the QUALITY and CHANNEL drop-downs and the main BYPASS button.
Input Learn
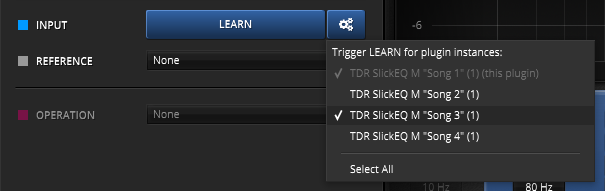
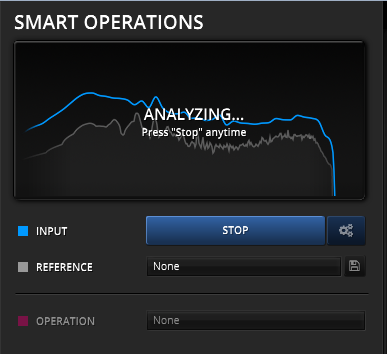 | In your audio application, start playback. Press LEARN for Smart Operations to analyze the audio input, and hit STOP anytime you consider adequate. Note: By default LEARN triggers the learn phase for all SlickEQ M instances in the session. This is particularly important for “REFERENCE by instance” relations. Hold the “alt” or “Apple” when clicking to trigger LEARN only for the currently operated instance. |
Learn Target Menu
In addition, the Learn Target Menu button can be used to define which SlickEQ M instances will be triggered by the LEARN button. This can be useful in mixing scenarios, or when trying to homogenize the sound of several songs within an album.
Reference
The REFERENCE and SAVE REFERENCE menu, allow loading, generating and saving external references. All matching oriented OPERATIONs depend on an active reference, as they directly compare the INPUT to the selected REFERENCE.
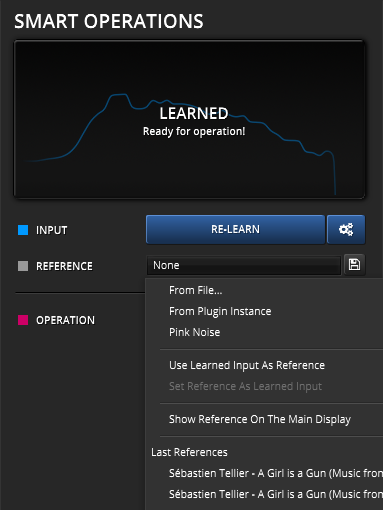
From File…
Loads an external reference from file. Supported are SlickEQ M’s own *.slickeqmref files and standard audio files (WAV, AIF, FLAC). Audio files are analyzed on the fly.
From Plugin Instance >
References another active SlickEQ M instance’s learned data.
Pink Noise
Pink noise spectrum, falling 3dB per octave.
Use Learned Input As Reference
Copies the current LEARN data to REFERENCE.
Set Reference As Learned Input
Copies the REFERENCE data to LEARN.
Show Reference On The Main Display shows the reference curve on the Main Display. Any active learn curve will also be visible on the Main Display. This allows for manual matching of the learned curve to the reference curve and also for manual fine tuning of the resulting match operations.
Last References
Last saved or imported references.
Save Learned Input/Reference
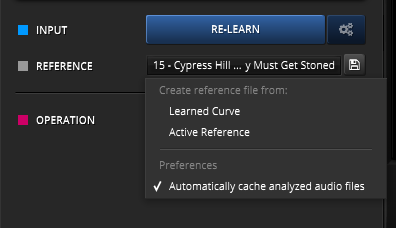 | The small SAVE REFERENCE button allows to export the active LEARN or REFERENCE data to file. The export file format is SlickEQ M’s custom reference format (*.slickeqmref). This menu also allows to enabled automatic caching for analyzed audio files. The cache is represented by a *. slickeqmref file being placed aside the original audio file, and greatly speeds up analyzing previously used audio files as reference. |
Operation
 | The Operation menu now finally gives access to following operations: Match Reference matches the INPUT’s spectrum to the REFERENCE spectrum, approximately. Note: Matching requires an active REFERENCE. Deresonate finds and reduces static resonances in the signal. Resonances are defined as both static, narrow and high level spectral patterns. Note: This stands in contrast to harmonics, which move in dependence of the signal. Auto HP/LP automatically sets the HP and LP filters frequencies in accordance to the signal’s own bandwidth. Pan/Width Match matches the input stereo width and/or balance to the input reference. Note: Matching requires an active REFERENCE. |
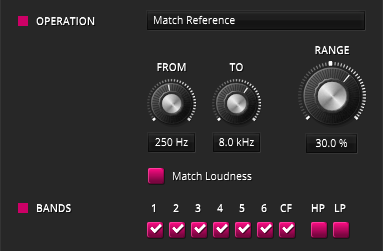 | Further fine-tuning options appear, whenever they make sense: The FROM knob controls the lower corner frequency of the bandwidth to be affected. The TO knob controls the upper corner frequency of the operation’s bandwidth. RANGE scales the extent of the operation, both positive and negative value are possible. The Match Loudness checkbox matches loudness between two the reference (only offered in Match, when Pink Noise not selected). |
Bands
 | The BANDS section restricts the operation to specific bands and filters. |
Cancel/Apply
 | CANCEL undoes any operation and closes the panel. APPLY closes the Smart Operation panel (and maintains the state set by the last Operation). Important: Make sure to always APPLY or CANCEL the SmartOps panel before closing the project. SmartOps do not persist across sessions, only their results do. |
Display On/Off
| Opens/closes the equalizer’s frequency magnitude display. Depending on your preferences, EQing “blind” (display closed) can lead to better results. |
Flat
| Flattens the current EQ setting. Only gain parameters are affected during this operation, band filter frequency and steepness for example remain untouched. Holding alt while clicking FLAT will reset all stereo manipulation to unity. |
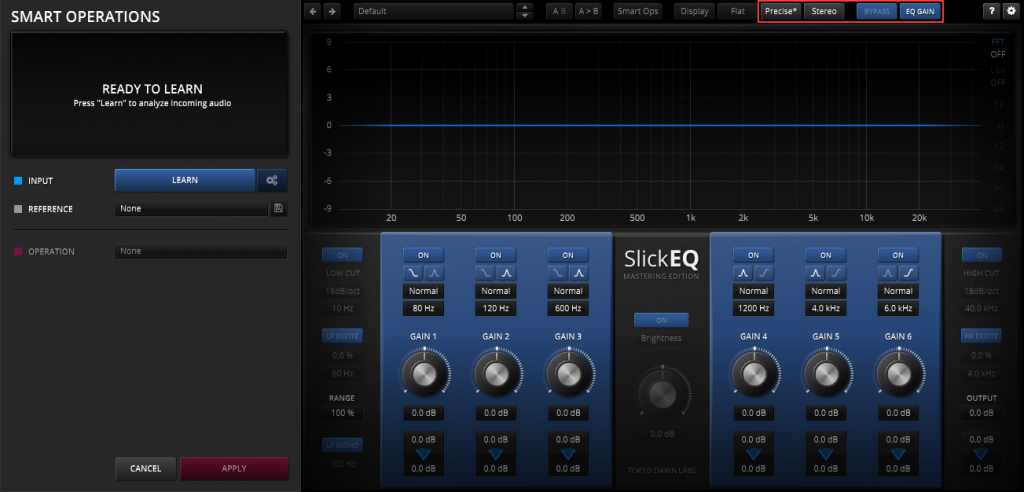
Processing Quality and Mixed Phase Modes
 | SlickEQ M offers four different Quality modes. These primarily affect anti-aliasing: · Eco: An economic CPU efficient mode with restricted functionality and parameter range. · Live: A zero latency mode with slightly compromised processing quality. · Precise: The default high fidelity processing mode. · Insane: A very high quality processing mode which also increases CPU load. Fixed Latency Mode compensates for the dynamic latency changes when using the Mixed Phase options. The Mixed Phase options enable greater phase linearity for the width and balance filters, which in turn increase their precision. This option introduces additional latency and CPU load. When active, a small asterisk “*” appears. |
Process-Target
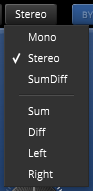 | The audio input can be processed in various channel modes: · Mono sums any input into mono. This is independent of the plugin host’s channel configuration. · Stereo enables conventional LR processing. · SumDiff offers a traditional M/S behavior, where GAIN controls the sum channel and WIDTH controls the difference channel. · Sum and Diff represents either “Mid” or “Side” processing accordingly. This processing is exclusive in the sense that only the selected target is processed, while the other is left untouched. Left and Right allow the left or right channels to be processed exclusively. |
Bypass
| Bypasses the whole processor. Processor latency is accurately compensated and the actual processing is never interrupted (gapless) to allow for better comparisons. |
EQ Gain
| This buttons turns the automatic EQ loudness compensation on and off. Activating this mode will prevent the operator’s decisions from being distracted by the “louder is better” phenomenon. |
Help
| This buttons turns on inline help tooltips. Click the help button again to turn them off. |
Settings
| The settings button opens a dialog which gives control over additional plugin options. |
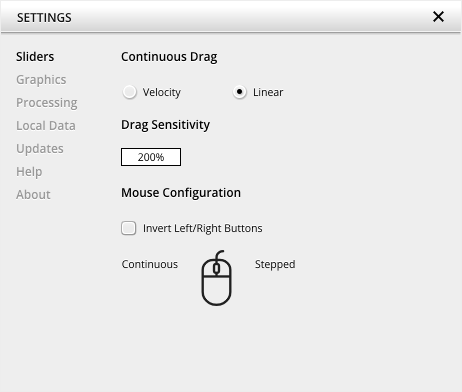
Slider allows for changing the behavior of knobs and control points in response to the mouse. Under Continuous Drag,knob and controller movement relies on mouse speed when Velocity is enabled. When Linear is enabled, knob and controller movement is proportional to mouse movement. Drag Sensitivity sets the linear sensitivity of the knob and controller movement further.
Plug-in controls, knobs, and control points can be adjusted using Left-click & drag (Continuous) and Right-click & drag (Stepped) by default. Mouse Configuration swaps the Continuous and Stepped behaviors between the left and right mouse buttons when selecting Invert Left/Right Buttons. Note that the default stepped values can be customized via the product configuration file. See “Local data” below for instructions on how to access this file.
Graphics allows for changing the interface size to a fixed percentage value between 100%, 125% and 150%.
Processing shows the plug-in latency and sample rate details. Highest quality rendering enables the option to always render at the highest Processing Quality, no matter what type is enabled in the Toolbar. See the “Processing Quality” subchapter for more details on these modes.
Registration offers access to offline and online product registration options. See the “Product Registration” chapter for more information.
Local Data allows for exporting and importing user preferences, presets, and keys, to and from other systems. Local data can also be deleted for all Tokyo Dawn Labs plug-ins using the Trash Can button.
In addition, the Folder button opens the Tokyo Dawn Labs local data folder containing all configuration files and keys. Note that these operations affect all TDR plug-ins, and not just TDR Limiter 6 GE.
Updates allows to Check for updates and to Download latest version. Automatic Lookups can be enabled to Check for updates (once per day).
Help contains Documentation and Support links.
About shows the version number, build date, format, credits, and other information.
Context Menu
Standard Context Menu
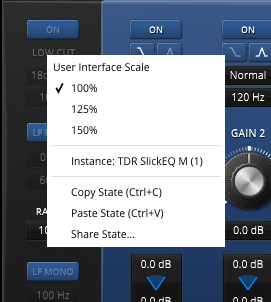 |
Additional options can be accessed using the standard context menu. This can be opened by right-clicking on a blank area anywhere in the UI. A click outside of the menu closes it.
User Interface Scale sets the on-screen interface size to a fixed percentage value of 100%, 125%, or 150%. Instance allows for renaming the specific plug-in instance. Copy State (Ctrl+C) and Paste State (Ctrl+V) allows copying control states (i.e. “presets”) across plugin instances and plugin hosts. Share State opens a dialog with additional preset sharing options via e-mail or internet forums. |
Keyboard Shortcuts
| Key | Action |
| Alt-click or Double-click (Win) Option-click or Double-click (Mac) | Resets controls to default values |
| Ctrl-click and drag or Right-click and drag on a control or its corresponding text box (Win) Command-click and drag or Right-click and drag on a control or its corresponding text box (Mac) | Stepped resolution adjustments on control and control points (according to the snap point defined in the plugin configuration file) |
| Alt+LF EXCITE or Alt+HF EXCITE (Win) Option+LF EXCITE or Alt+HF EXCITE (Mac) | Toggles both LF EXCITE and HF EXCITE on or off simultaneously. |
| Control+C (Win) Command+C (Mac) | Copy plugin state |
| Control+V (Win) Command+V (Mac) | Paste plugin state |