
By Shane Johnson
The TDR NOVA GE is a true workhorse when it comes to corrective EQ procedures in your audio productions. In particular, it’s dynamic equalizer can be effective for taming those pesky plosives without interfering too much with your original performance.
This article will take a detailed look at using NOVA’s dynamic equalizer to reduce those plosives that can sometimes find their way into your audio material. Though the following example uses NOVA Gentleman’s Edition, this technique can also be done using NOVA Standard Edition.
Plosives
We’ve all heard them. Those basey, thumpy, and sometimes distorted bursts of air on consonant sounds in our vocal, voice over, and dialogue tracks. They’re most commonly heard on words with consonant sounds such as P, B, T, and K, among others. Also described as plosive thumps, they’re caused by strong bursts of air hitting the mic diaphragm and thus creating excessive pressure changes. While there are many common preventive measures to avoid plosives reaching the microphone entirely, sometimes the odd one will find it’s way through. If you find one of your tracks plagued with plosives, then there are a few methods and techniques that can be done to reduce them. One of these methods that we’ll be looking at uses the Band Solo mode and multi-band compressor found in NOVA GE.
Zeroing In
Let’s start by focusing in on the frequency of the problematic plosive. To do this, the Band Solo mode will be used. This feature enables a solo mode which allows for hearing the selected band in isolation.
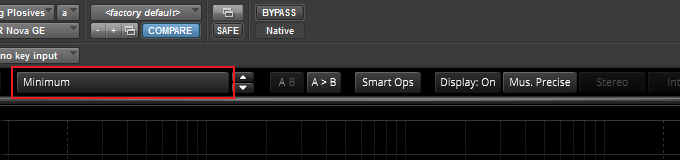
With TDR NOVA GE inserted and open, use the Minimum preset as a starting point:
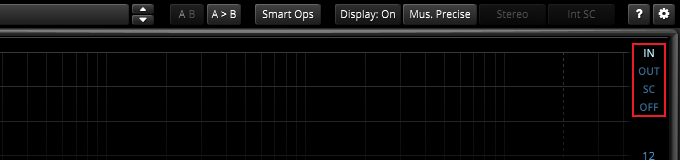
From there select the source of the Spectrum Analyzer to In:
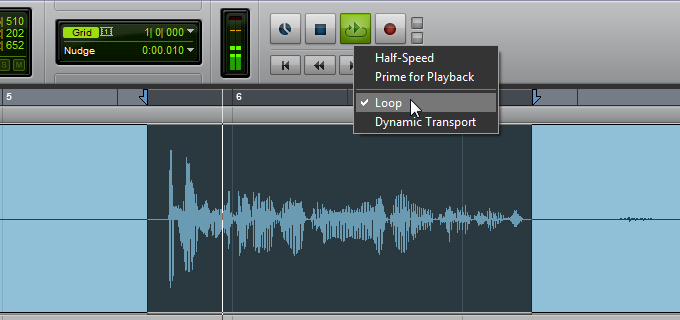
In your DAW, select a short track range that includes the plosive and start loop playback:
Next, double click on an empty area to enable a band handle:

Now press Ctrl+Shift+Click(Apple+Shift+Click on Mac) on the band handle to enable the Band Solo mode, then sweep the frequency until you’ve isolated the main thump of the plosive:

Further fine-tuning and isolation of the plosive thump can be done by adjusting the Q. To do this, Ctrl+Shift+Click(Apple+Shift+Click on Mac) on the band handle then move the mouse wheel to set it’s width:

Reducing the Plosive
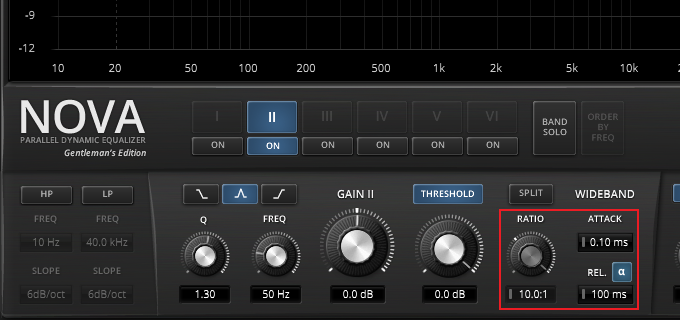
The next step is to reduce the plosive using Nova’s multi-band compressor. The multi-band compressor will allow you to compress only part of the signal, which will be the plosive thump that was isolated above.
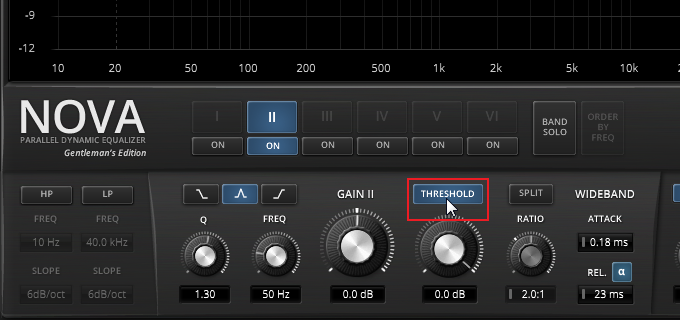
Activate the selected band’s compressor by clicking on the Threshold button:
Adjust the Ratio so it’s 10.0:1. Use a quick Attack(0.10 ms) to capture the initial plosive thump and set the Release to roughly match the plosive’s duration(100 ms in this example). This Release time will allow the reduction to occur only during the plosive and not across the entire signal:
The final step will be reducing the plosive using the Threshold knob. Loop playback the audio and gradually reduce the Threshold until that low end plosive thump is noticeably reduced. You’ll want to find that sweet spot where the low end thump is lowered, while the remaining audio signal stays unaffected:

Moving Onward
The above method described can also be applied to any other frequencies of the plosive that may need reducing. This corrective repair allows for a fresh starting point without the original plosive problems. With those pesky plosives finally purged, you can now move on to the more traditional processing of the signal such as compression, equalization, de-essing, etc.