The Concept
DeEdger introduces a new way of reducing the hardness of audio signals without negatively altering the original signal qualities.
The plugin operates in a threshold free manner, thus can comfortably handle any input signal level, type, and dynamic range. Where other plugins might under or over process, DeEdger only applies processing if any hardness is detected. Once detected, the hardness will be smoothed with remarkable elegance. After initial setup, DeEdger can be left in a “set and forget” configuration without further attention.
Intricate time and frequency dependent mechanisms allow DeEdger to provide a very transparent process throughout. Developed and fine tuned by a professional mastering engineer, the initial concept focused on the demands of modern audio mastering and has also turned out to be equally useful for mixing.
Key Features
- Control the hardness of audio material while preserving dynamic impact and musicality.
- Suitable for complex stereo material, including individual tracks and subgroups.
- Low CPU load.
- Intuitive user interface.
- Set and forget.
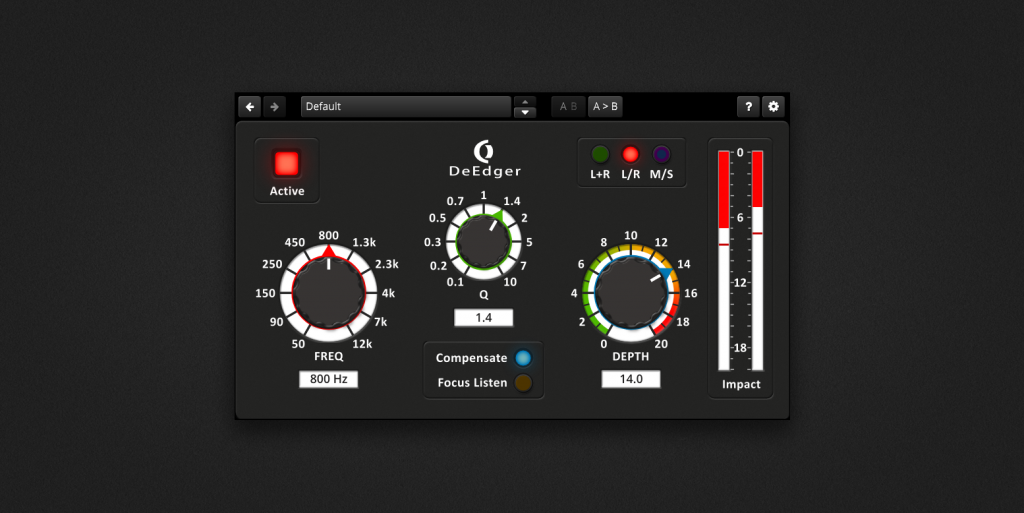
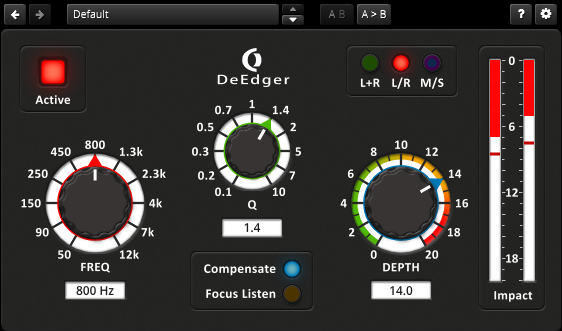
Controls
Main Controls
 | Active: Activates the processor. Note: This is not a full bypass when switched off. It only activates/deactivates the DeEdger process. If Focus Listen is activated, you can enable/disable the Active button to better hear what happens to the affected frequency area. |
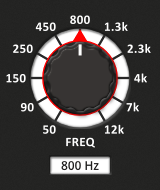 | FREQ: Sets the target frequency band of the DeEdger process. Note: All rotary knobs have stepped mode activated by default. For temporal non-stepped adjustments, simply hold the right mouse button while moving the mouse. You can change its behavior in Settings. |
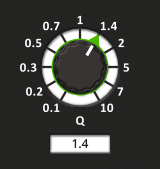 | Q: Sets the target Q of the DeEdger process. Here the bandwidth is set to where the de-edging takes place. |
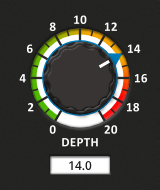 | DEPTH: Sets the strength of the DeEdger process. Higher values will result in stronger processing. Values >10 are not recommended for program material/mastering, since it will likely introduce side effects. |
Channel Mode
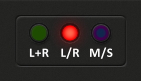 | These three buttons are used to setup the channel mode that DeEdger operates in. The modes are as follows: L+R: When activated, the left and right channels are linked. This allows for the edge reduction in the target area to be the same for both channels. L/R: When activated, the left and right channels are unlinked. This allows for the edge reduction in the target area to operate independently in the left and right channels. M/S: When activated, de-edging is performed in Mid/Side, M-only or Side mode, depending on which colors of the button are activated: Blue+Purple: Mid/Side channel mode is activated Blue: Mid-only channel mode is activated Purple: Side-only channel mode is activated |
Compensate & Focus Listen
 | Compensate: Enables/Disables dynamic loudness compensation of the DeEdger process in the target band. Focus Listen: Soloes the target frequency band of the DeEdger process. Tip: Use the “Active” button to switch on/off the DeEdger process. |
Impact Meter
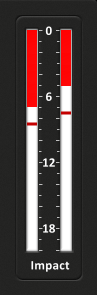 | Impact: The Impact meter shows the amount of the DeEdger process. The value is in dB. |
Toolbar
Undo/Redo
| Use the Undo/Redo buttons to navigate previous control states. The exact event is shown in a tool-tip. Note: Certain controls are not tracked by this function (e.g. “Bypass”). |
Preset Management
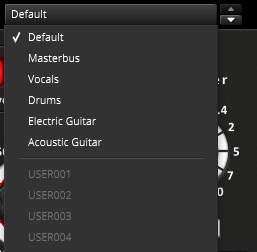 | The preset drop-down list offers quick access to factory settings and user presets. Alternatively, the up/down buttons allow you to cycle through the presets. |
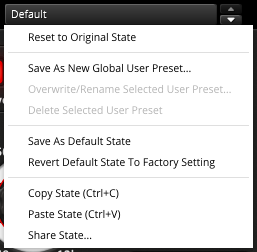 | Advanced preset management options are available from the context menu (right-click). Reset to Original state resets the currently active preset to its original state. Save As New Global User Preset opens a dialog used to create User Presets. Note that these presets persist across sessions and DAWs (presets are saved on your machine). The total amount of user presets is limited to 20. Copy and Paste allow copying control states (i.e. “presets”) across plugin instances and plugin hosts. Additionally, Share State opens a dialog with additional preset sharing options via e-mail or internet forums. These three options are available in the standard context menu as well. |
A/B Control
| A/B allows comparing between two alternative control settings. A>B or B<A copies one state to the other. |
Help
| The online help mode offers detailed information about the different elements of the user-interface. Click the “?” button to activate the online help mode and move the mouse-cursor above the control of interest. A mouse-click closes the help-mode again. |
Settings
| The settings button opens a dialog which gives control over additional plugin options. |
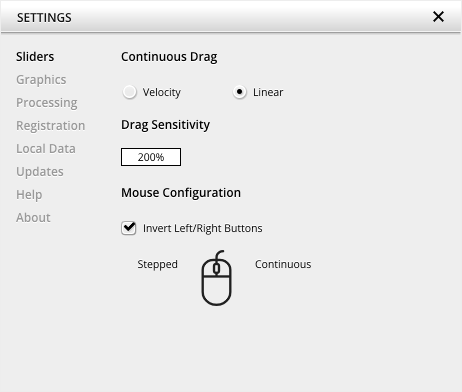
Sliders allows for changing the behavior of knobs and control points in response to the mouse. Under Continuous Drag,knob and controller movement relies on mouse speed when Velocity is enabled. When Linear is enabled, knob and controller movement is proportional to mouse movement. Drag Sensitivity sets the linear sensitivity of the knob and controller movement further.
Plug-in controls, knobs, and control points can be adjusted using Left-click & drag (Continuous) and Right-click & drag (Stepped) by default. Mouse Configuration swaps the Continuous and Stepped behaviors between the left and right mouse buttons when selecting Invert Left/Right Buttons. Note that the default stepped values can be customized via the product configuration file. See “Local data” below for instructions on how to access this file.
Graphics allows for changing the interface size to a fixed percentage value between 100%, 125% and 150%.
Processing shows the plug-in latency and sample rate details. Highest quality rendering enables the option to always render at the highest Processing Quality, no matter what type is enabled in the Toolbar. See the “Processing Quality” subchapter for more details on these modes.
Registration offers access to offline and online product registration options. See the “Product Registration” chapter for more information.
Local Data allows for exporting and importing user preferences, presets, and keys, to and from other systems. Local data can also be deleted for all Tokyo Dawn Labs plug-ins using the Trash Can button.
In addition, the Folder button opens the Tokyo Dawn Labs local data folder containing all configuration files and keys. Note that these operations affect all TDR plug-ins, and not just OD DeEdger.
Updates allows to Check for updates and to Download latest version. Automatic Lookups can be enabled to Check for updates (once per day).
Help contains Documentation and Support links.
About shows the version number, build date, format, credits, and other information.
Context Menu
Standard Context Menu
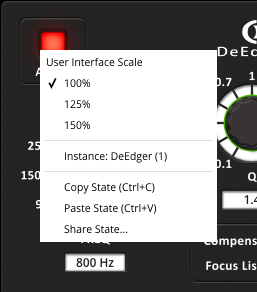 | Additional options can be accessed using the standard context menu. This can be opened by right-clicking on a blank area anywhere in the UI. A click outside of the menu closes it. User Interface Scale sets the on-screen interface size to a fixed percentage value of 100%, 125%, or 150%. Instance allows for renaming the specific plug-in instance. Copy State (Ctrl+C) and Paste State (Ctrl+V) allows copying control states (i.e. “presets”) across plugin instances and plugin hosts. Share State opens a dialog with additional preset sharing options via e-mail or internet forums. |
Mouse Control Behavior
All controls within the plugin feature acceleration. Fast movements of the mouse make large changes and slow, small movements allow for fine tuning of settings. Alternatively, it is possible to revert the knob behavior back to a linear mode. Open the settings dialog to access these options.
Press either Alt-click or Double-click a control to reset to its default value.
Keyboard Shortcuts
| Key | Action |
| Alt-click or Double-click (Win) Option-click or Double-click (Mac) | Resets controls to default values |
| Ctrl-click and drag or Right-click and drag on a control or its corresponding text box (Win) Command-click and drag or Right-click and drag on a control or its corresponding text box (Mac) | Stepped resolution adjustments on control and control points (according to the snap point defined in the plugin configuration file) |
| Control+C (Win) Command+C (Mac) | Copy plugin state |
| Control+V (Win) Command+V (Mac) | Paste plugin state |
Appendix: Adaptive Load
DeEdger implements a feature which we developed and that we named “Adaptive Load”. “Adaptive Load” is a mechanism that is constantly monitoring the audio signal and the corresponding states (like e.g. memory of filters) and freeing up resources whenever possible – without any impact on the processing quality. When DeEdger is e.g. inserted on a guitar track where the guitar is only playing on some parts of the song, the “adaptive load mechanism” detects whenever the guitar is not playing and then bypasses all of DeEdgers filters & other processing, resulting in almost 0% CPU usage. This typically happens within several milliseconds. As soon the guitar is playing again, DeEdger re-enables its processing. Of course, the whole process is fully transparent without any drawbacks.
So what is the motivation of implementing such a feature? DeEdger is already having a very low CPU usage, but with the new “Adaptive Load” technique, resources are freed when not needed, which means you can use more plugins in your project and/or you will have a lower export rendering time.